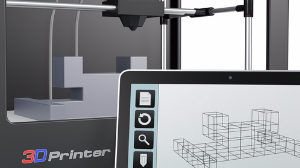
Rapid prototyping with 3D printing is one of the most effective and efficient ways to test, iterate, and ultimately perfect your design concept as you move down the road to production. Prototyping is a critical component of product development, but that doesn’t mean it has to be excessively costly or time-consuming. Rapid prototyping enables you to forego costly tooling and machine setup processes, and make use of 3D printing, which relies simply on the machine and the design file to get up and running.
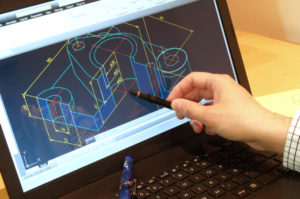
 3D CAD design is the most effective way to get your product design ready for rapid prototyping. Regardless of whether your current design consists of a napkin sketch, technical schematic or 2D design file, 3D CAD design (and 3D CAD design services) should be the bridge step as you move to the prototyping and testing phase. Below, we’ll talk more about why — and provide you with several other CAD drafting tips to make sure that you can get the most out of your prototype.
Rapid prototyping with 3D printing is one of the most effective and efficient ways to test, iterate, and ultimately perfect your design concept as you move down the road to production. Prototyping is a critical component of product development, but that doesn’t mean it has to be excessively costly or time-consuming. Rapid prototyping enables you to forego costly tooling and machine setup processes, and make use of 3D printing, which relies simply on the machine and the design file to get up and running.
 3D CAD design is the most effective way to get your product design ready for rapid prototyping. Regardless of whether your current design consists of a napkin sketch, technical schematic or 2D design file, 3D CAD design (and 3D CAD design services) should be the bridge step as you move to the prototyping and testing phase. Below, we’ll talk more about why — and provide you with several other CAD drafting tips to make sure that you can get the most out of your prototype.
Design for the specific rapid prototyping process in use.
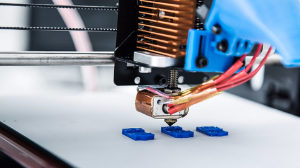
There are many different types of 3D printing and rapid prototyping processes available. The filament or thread-based processes, such as FDM (fused deposition modeling), apply a thread of substrate in layers to build the part. Other processes such as stereolithography (SLA) and selective laser sintering (SLS) work from a bed of powdered material, similarly building the part layer by layer.While the principle of each process is similar — adding thin layers one by one until the part is complete — they differ greatly in execution and application. It’s important to know the best practices for the type of rapid prototyping you’re going to use, or, alternatively, to choose a process based on the design needs of your part. Extremely acute or thin angles, for instance, are more easily achievable with a thread-based process, while angles and thicknesses with powder-based processes should only get as small as 0.020” – 0.030”. Understanding dimensional best practices such as these will help lead to a more testable and reliable part, ensuring that your prototype serves the purposes that you need.
Consider hollowed or latticed interior sections.
Unlike traditional manufacturing processes, 3D printing offers much greater flexibility over the design of part interiors, which can yield benefits based on your product requirements. Whereas with a process such as grinding or milling, it’s faster and easier to leave parts solid rather than hollowing them — the additive nature of 3D printing makes it relatively simple to create hollow or latticed sections, if dense or solid walls are not a necessity.Look at the structural and strength requirements of your part or product to determine whether hollow or latticed walls might be an option. Different 3D printing materials can also offer differing levels of strength and resistance, so hollow walls might be an option for one material but not for another. The benefits of analyzing your design and requirements, and exploring design options like this, are several:- Less material used, so lower material cost
- Faster prototype output
- Lighter part weight and lower shipping costs
- If 3D printing is used as a low-volume production process, lower shipping costs provide an even greater cost benefit.
Prioritize what you’re prototyping.
Prototypes serve different functions — you might be prototyping to test the functionality of a part, or its appearance and fit. You might need a purely aesthetic prototype for investor pitches or promotional purposes. It’s important to know in advance what you want to use (and, potentially, test) your prototype for, so you can prioritize what you’d like to include in your 3D CAD design. Intricate logos or other designs, for instance, aren’t likely to be integral to the function of your part. If you’re able, you should design prototypes for testing to be as simple as possible, worrying later about aesthetic elements that aren’t critical to the function of the product. On the other hand, if you’re prototyping purely for design, you needn’t spend unnecessary time on the function of the part at this particular stage. The cost-effective nature of rapid prototyping makes it easy to iterate prototype designs for different purposes, while remaining within budget and friendly to your bottom line.
 Intricate logos or other designs, for instance, aren’t likely to be integral to the function of your part. If you’re able, you should design prototypes for testing to be as simple as possible, worrying later about aesthetic elements that aren’t critical to the function of the product. On the other hand, if you’re prototyping purely for design, you needn’t spend unnecessary time on the function of the part at this particular stage. The cost-effective nature of rapid prototyping makes it easy to iterate prototype designs for different purposes, while remaining within budget and friendly to your bottom line.
Consider the output of your 3D printed part.
The output of 3D printed parts and prototypes is unique among manufacturing processes. Taking these factors — and others — into consideration in your 3D CAD design will help produce a more successful part.- Are structural supports required? For parts that aren’t self-balancing or that have unconventional geometries, supports must almost always be built in to the 3D CAD design. Without supports, the part may break or collapse during printing, requiring design modifications and additional production time.
- How should the part be oriented? In general, parts with one dimension significantly greater than another should be “vertically” positioned (as opposed to horizontally) to take advantage of the structural qualities of the 3D printing process. Positioning these types of parts in this way provides greater strength and structural integrity.
Be sure to use 3D CAD design.
 As mentioned above, 3D CAD design is the best — and really, the only — method you should use for 3D printing and rapid prototyping your part. File formats such as .stl may be improperly converted to a 3D format, resulting in unintended design consequences and, in the worst case, a failed part. Working from the beginning in 3D CAD format ensures that your design will be properly translated and interpreted by software and machinery. It’s also important to pay attention to measurement units, as 3D CAD formats are typically in millimeters, while other formats may be in inches — again, resulting in unpredictable and unintended results. A small amount of attention to detail here can make a big difference in the final amount of time and cost investment in your rapid prototyping stage.With these five tips, you’re now able to produce effective and successful designs to make use of one of the most advantageous prototyping processes available in 3D printing. Should you have any further questions, or would like to know more about our 3D CAD design services, contact RevPart today.
 As mentioned above, 3D CAD design is the best — and really, the only — method you should use for 3D printing and rapid prototyping your part. File formats such as .stl may be improperly converted to a 3D format, resulting in unintended design consequences and, in the worst case, a failed part. Working from the beginning in 3D CAD format ensures that your design will be properly translated and interpreted by software and machinery. It’s also important to pay attention to measurement units, as 3D CAD formats are typically in millimeters, while other formats may be in inches — again, resulting in unpredictable and unintended results. A small amount of attention to detail here can make a big difference in the final amount of time and cost investment in your rapid prototyping stage.
